Monday, August 29, 2011

Simple Sack

The Yokohama walking shop, Kamoshika, gives out a couple of bags to those who join their loyalty scheme. Then, rather than hand over a card at the cash desk you wave a bag and they take n% off the purchases as they put them in the bag. One of the bags is perhaps the most simple rucksack there is. Basically it's a drawstring nylon bag, but the strings are webbing and attached to rings in the bottom corners, so it can carried on the back.


When we went to volunteer in Ishinomaki, we couldn't carry that much stuff so James took this extremely lightweight rucksack and it worked out well, so I decided to make one for me. I also added an insert to both bags to allow a Platypus water carrier to be carried a little separately from the other things in the bag. The pattern for the main body is pretty simple - just a rectangle with some folds in. The metal rings came from the make your own handbag section of Swany, in Kamakura. The seams in the original and the copy are bound with tough binding so that the binding takes some strain off the fabric. I made the bag out of left over trench coat fabric, and the Platypus holders are made of Pertex.


Thursday, August 11, 2011

More cool bizz

The faux suede shorts wore through and James requested more. I found I still had enough tencel left to make another pair, just like the last ones. In fact I had just enough fabric for 2 pairs, although there was one flaw in the fabric which appears on the arse of one pair. I also managed to cut a waistband out wrong (not straight enough on grain) and then didn't have enough to cut another one long enough, so one of the waistbands has side seams. Due to the small overlap at the front, I fastened them with a snap rather than a button and the waistband was interfaced with Pro-Weft Fusible

After they were finished James told me that he always wants rear pockets in trousers, even shorts. This pattern doesn't have a rear pocket and I'd assumed since he'd been wearing both previous pairs happily for years that an exact remake of the pattern would be desired. Oh well.

Here's a recycled photo from 2006, but it's not that inappropriate as the shirt is still being worn too. The shoes are relegated to gardening only, but the model has only become more handsome. 


Lovely James

Monday, July 25, 2011

hippo-crit

About a year ago, instead of using the used tea leaves to grow mould in the sink trap, I made James dry and save and store them all in tins. It was really the mother-in-law's idea as she had remarked that old tea leaves make good stuffing for pin cushions and the like.

The question was, which stuffed toy should we make. We pondered various options, but suddenly realised that we needed a hippo in order that the one of us being the most hypocritical at the time, could be given the hippo. 
For the first time I made a purchase on a website called Etsy. I bought a pattern called Heather Hippo, by FunkyFriendsFactory. The pattern arrives as a PDF file a few days after the order is placed, and then it can be printed out. Wanting a slightly smaller hippo, I printed out the pattern at 75%. The pattern is very well made and the pieces fit together very well indeed. The instructions were also comprehensive. 


I found enough red fur for about 600¥ in the bits bin at Yuzawaya in Kamata, used fake suede for the contrast and sewed Hippo up my hand. The tea gives her almost a bean-bag feel, and she smells very nice, but I should have made a lining out of a closely woven fabric, as little bits of tea are going to escape through the somewhat loose weave of the slightly stretchy red fur fabric.


Friday, July 22, 2011

therma-stuff

Last week we went volunteering in Ishinomaki, one of the the tsunami hit cities of north Japan. See here for the story and here for some videos and photos. Shelter was the campsite at the local university so I took the opportunity of upgrading my leaky thermarest to the fabulously expensive super-light NeoAir Thermarest. This piece of equipment is so expensive that the stuff sack is sold separately (here it is on Amazon). Bugger that, thought I, and swiftly stitched up my own version with some Pertex that I had from when I made cycling tops and bottoms for James. The NeoAir, although a bit noisy, certainly was comfortable, and we had such a good time volunteering that we intend to go again, only this time we hope to take our bike, so James will not be able to bring his air bed. Thus, a longer NeoAir has been duly purchase, and a slightly larger stuff sack knocked up.

The stuff sack consists of a rectangle, sewn with a single seam to make a pipe, stitched onto a circle on one end and with a hem on the other through which a string is threaded. One sentence! 15USD on Amazon!


Wednesday, July 20, 2011

Marfy trews #4

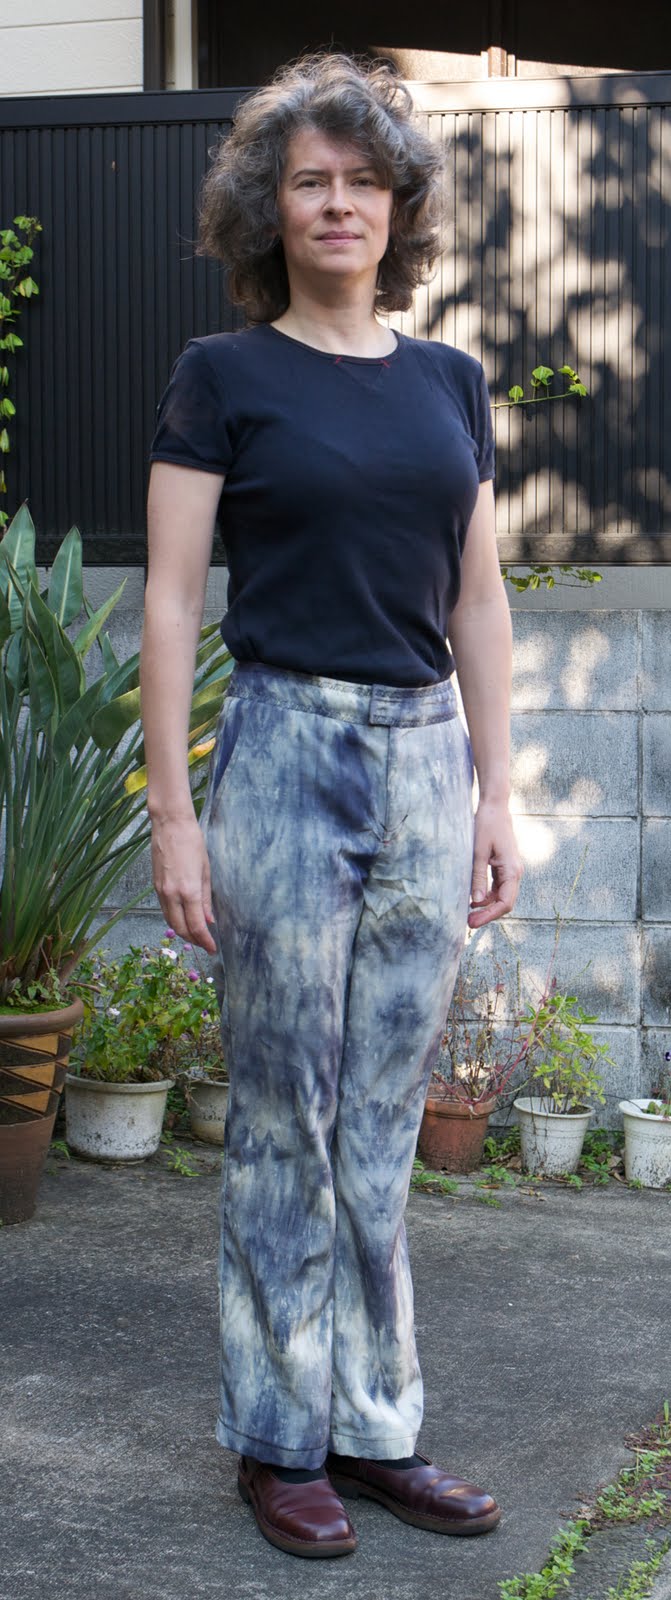
I made another pair of Marfy 0680, this time in a fairly heavyweight (at least so it seems from here in the middle of the Japanese summer), striped stretch fabric from Gorgeous Things. I made jeans style pockets on this pair, and added patch pockets to the back. With the stretch, they seemed looser, and I took them in a fair amount (making about 2cm extra seam allowance) on the outside seams. They have come out feeling a little long from waist to crotch. In theory I could I suppose take off the waistband and move it down a centimeter or so, but probably I won't get a round tuit.


So, I haven't actually worn these yet, except a little round the house just after they were finished and very quickly just now to take the photo, because, just as I finished them, summer suddenly arrived. Stretch trousers are really comfortable on aeroplanes so I hope these they may be an alternative to these flower trews which are now rather faded.

Friday, June 03, 2011

J's Trenchcoat

At last, many years after I made a trenchcoat for myself, someone (Vogue patterns) brought out a pattern for a men's trench coat! This is V8720. I'd considered making a coat for James - we even went snoop shopping in San Francisco last year to consider styles - but I had been very put off by the available patterns. On the verge of adjusting my trenchcoat pattern for James, luckily this pattern came out just in time to save me all the work. 


The search for fabric was taxing. The idea was to make a coat with a softer drape, unlike the typical tight fitting straight-jacket style worn by the prim young salarymen in Tokyo (James is not prim!). I ordered swatches from Rockywoods and Gorgeous things, and eventually we chose some shiny and slightly crinkly dark brown slippery stuff. It isn't waterproof, but is hopefully showerproof,  and it cost quite a lot. I tested pretreating the fabric in various ways. Washing it seemed to shrink it a little, but more importantly it lost significant water repellency. So instead I ironed the whole yardage with a cool iron to preshrink it a bit so that it could be washed in the future if required, and also so that it would not shrink as I ironed it during construction. Getting the interfacing to stick down with the cool iron was a challenge, but I think it is all stitched down by all the edge and topstitching so it should be OK. It is rather softly interfaced (with pro-weft), and tacking down a fusible interfacing with the iron seemed preferable to sewing in interfacing, which would have made additional holes in the fabric!  

I had plans to line the coat, but the pattern is deliberately designed to be unlined, with carefully finished seams and large front facings. Since this version is meant for use in rainy season in Japan, when it is warm and wet, we decided to go with the unlined version. My feeling is that this will not aid the performance in wet weather as when it gets wet it will probably stick to the clothes underneath. The fabric is, however, very slippery so perhaps it will be OK. Time will tell. I finished the coat several weeks ago, and it has been quite wet in Japan ever since - but we have been away in a very dry part of the USA instead - so it had yet to be thoroughly tested. 

I happily used up some accidentally purchased (otherwise known as "what was I thinking?") cotton to make a test garment for fitting, adding several inches to the length of body and arms. I cut size 40 for the test, but ended up increasing the width across the back and shoulders, somewhat and fitted the size 42 collar pieces to the adjusted body. The resulting coat is perhaps a bit loose across the chest. The main mistake in construction (apart from sewing one pocket on upside-down and the other inside out, which I managed to recover from by sewing a new pocket bag onto the wrong way up one) was not altering the position of the lowest button after lengthening the garment. I think this button is too low, and will sometimes have to be released so that it does not restrict motion. The buttons are deliberately size 30mm rather than 25mm - I thought the over-sized buttons added a little something to the intended looser styling. Other changes from the pattern were to add a pertex lining (purple!) to the back flap piece, and also to stitch down the centre of the flap. The belt loops were fitted according to taste of the wearer, somewhat below his true waist. Otherwise I basically followed the instructions. I intend to include a belt buckle, but have yet to travel in to Yokohama to get one.


Sunday, March 27, 2011

Thermo-nuclear gloves


Found some Polartec Windbloc at Rockywoods and made lobster cycling gloves for him and her. The fabric description says - "Brown Nylon Canvas face and Cream Shearling back. This fabric would make a nice jacket, vest, hat, mittens and other outerwear". The fabric is pretty stiff and thick, so these were put together slightly differently to the previous pair. I trimmed the fleece from the edges before stitching, overlapped most of the seams, handstitching where required, and made the gusset between the pincers from the more pliant windstopper fabric used for the last pair. The photos show one hand from each pair. James' pair came out too tight, because I stupidly used the same pattern as before even though this time the fleece was on the inside, rather than outside. Some surgery has fixed this; cutting them open and adding a windstopper gusset down the thumb. As well as giving the required room, this gusset does make the fit look better. I suspect that fitting a similar gusset down the index finger would further improve the fit. Some of my gloves do include such a thing, although it is clear from looking at all our pairs of gloves that there are many acceptable ways of constructing a pair of gloves.


Of course now it is warming up here a bit, so these wont get properly tested until next year, however, mine did keep my hands warm and dry in a relatively cold and rainy day recently. James' have only just been finished so are not tested yet.

Sunday, February 20, 2011

World's best Mini MacbookAir case

World's best because it seems to be the world's only. Can't find any cases designed to fit the thinking woman's iPad, and so now have to face the fact that the only things in the MacStore that we haven't bought yet are the things that haven't been invented. Not that the thinking woman's iPad necessarily requires a case, but it would be a shame to pull it out of my rucksack and find it had a big scratch across the top.

This case is made from leftover denim lined with leftover wool, fastened  with two little magnetic fasteners. Total cost: 200¥ (1.66 UKP) plus a few hours hard labour. It being denim, I had to include a patch pocket, so I made it to fit an ipod, as I often carry both items around together at work.  

Tuesday, February 15, 2011

carpet trousers


As the winter wore on, James begged for another pair of what have become known as carpet trousers - winter-weight baggies. These ones are not cotton, but wool, quite thick with a very coarse weave. Like the thick cotton baggies, I finished the edges of the fabric first, to stop it all unravelling. The fabric caused the thread to wear thin and snap periodically. I am not sure why this was - but guess that parts of the thick weave are very dense.


Monday, February 14, 2011

woolly hoody

A remake of my version of the hoody from Burda 8291 last made in 2006. 

The first version, linked to above, has been so well worn and complimented that I'd thought it was time I made another. Then, in December, visiting Britex fabrics, located conveniently near the Moscone Center in San Francisco (where I was attending a conference) I found an expensive sheer loopy woolly knit, and bought 2 yards of purple and two of blue with the bold idea of making a reversible hoody.

Since this is for cold weather I added 10cm to the length.  I machine washed one of the pieces and then decided it had been a bad idea and washed the other piece in the bath. Handwashing only for this jumper then. I did manage to steam the first piece back into shape before cutting out. 

This is a delicate fabric as it catches and pulls on any rough surface. When this happens it is possible to repair it, but my conclusion is that this is best worn indoors, for example, at work. Another reason it is good for indoors is of course that despite being warm and fluffy and cosy when there is no breeze, the wind goes straight through it. Luckily it is frequently cold inside Japanese buildings, including work, so I expect to wear it quite enough to wear it out. 


Surprisingly the machine handled the fabric, a wool and acrylic mix, quite well. I interfaced the shoulders, neck, cuffs and hem. I wondered how to join the two colours together but in the end I just made a blue hoody and a purple hoody and then top stitched and edge-sticthed the two together at the hood edge, cuffs and hem.


The inevitable mistake. My house is rather dark inside and it is sometimes difficult to recognise the difference between fabric face and back. I really thought this fabric was the same on both sides (I'd checked this in Britex too, and the shop assistant had thought likewise), but the moment I joined the two hoodies together I realised that the body of the blue one is inside out! Oh well!


Sunday, January 30, 2011

Gloves Galore

In autumn I lost one of my favourite cold weather cycling gloves. I think I left it on a bus. The pair not only fitted like gloves, but were the best I had for both bicycling, every day, and mountain climbing. What a sad loss...

So I bought some kevlar and some Gore-windstopper from Rockywoods, and started to learn how gloves are constructed. I looked at all our pairs of gloves. They are all rather differently constructed. It seems there is no right way to make a pair of gloves. I drew around my hand and also James', and made some mockups and then some wearable mockups out of some leftover lightweight windpro. Now my friends are fascinated that my gloves match my jacket! These gloves are OK for autumn or spring but not warm enough for winter cycling. They also are not good for cycling as they have no padding on the palms.   

Somewhere along the way, my lovely idea of a pair of all-round winter gloves for me got transformed into a pair of lobster-claw cycling gloves for James. I'm not sure how... partly because I am soft, but also because I can put a pair of lightweight fleece gloves inside the windpro ones and have a result warm enough for cold days and mountains, and I do also have a pair of winter cycling gloves that are not quite as warm as the one I lost, but could do with being worn out of my closet. 


The big leap of understanding in the hiatus between the construction of the windpro gloves and the lobster claws was the realisation that we don't walk around with our fingers straight, but with them curled towards the palm. Thus, flat gloves work their way off the hand in use. The lobster claw pattern has shorter fingers on the palm side, and the gusset between the middle two fingers is also interestingly shaped. 


I am told that the results are nice and warm but it turns out that this particular Gore windstopper is not the best for gloves because it has a fleecy outer and a smooth lining. For gloves you want a hard outer and fleecy inner! You'd think I could just turn it round, but the lining has a kind of loopy stitch that would catch on any rough edge. So I've sent off for some more bits from Rockwoods - then perhaps I will be able to start work on my all-round winter gloves...?

Some stitchers measure their progress on their fabric stash in terms of yardage in and yardage out. Be warned that spending a month making gloves is disastrous when seen in these terms!! I have worked through barely a metre, and bought several metres for future projects in the meantime...!

[Note for jules - have adjusted the finger lengths on the gloves pattern, but need to re-design the gussets]

Update:
Found some scraps of blue Polartec Powerdry of just the right size, and lined the gloves. James seems happy, but now, of course the weather has warmed up...

Tuesday, January 04, 2011

Boxers #2

Last year, before we went to the UK, I made 2 pairs of boxer shorts for James.

One pair were a remake of these also made from some leftover silk. I did take a picture but can't seem to find it now. Being "airy" they go very well with the man blouse for summer lounge-wear.

The second pair were more complex, being a copy of James' favourite but fallen apart boxer shorts. Since they had already fallen apart I just fully cut them up to copy the pattern. The pattern was more contoured than the very simple design of the Jalie 2326 used for the other pair. I made them up in leftover black Polartec Powerdry. The idea was to make some boxers that may be good for mountaineering. To me they look quite bulky, but James says they are very comfortable. No photo of these as yet. These seem to be a superior pattern to the Jalie for actual use as underwear, and are good for using up leftover fabric, but probably wont be used again for a while, as James seems to very well supplied with underwear...

Saturday, November 06, 2010

Marfy trews

I bought a couple of trouser patterns from the Marfy 2008 catalogue. I was looking for a pattern to make summer weight casual trousers. The pantaloons (from the 2010 catalogue) were a wild experiment along the same theme, but 0680 looked much more likely to be useful. While trouser patterns are perhaps the most difficult to fit, but Marfy skirt patterns do tend to fit me quite well, so I was hopeful. Neve
rtheless, first I made a mockup version, cutting up a pair of cotton baggies and turning them into shorts. Since they were just for practice I didn't bother putting pockets in these, apart from using the one already present on the back of the baggies. I'm sure the experts of trews fitting would spot issues, but just like the Marfy skirts, these fit me really well. So I went ahead and cut into the hydra
ngea print cotton from a local shoppe. I made these straight leg - I'm really not tall enough to carry off seriously flared trousers. This time I included the patch pockets on the front. In fitting I very slightly widened the hips in the pocket area - by less than 0.5cm. These were stitched in August, and were taken to the UK and worn there for a few weeks, until the weather became too cold.


On return to Japan in October, I made the third pair, in an abstract pattern polyester, from the posher of the two fabric shops in Kamakura. This time I made internal pockets and discovered that I had to widen the outside seam by a further cm or so. I think this is not just from having got very fat while in the UK, but also required in order to enable usage of the internal pockets. It is now too cold here to wear these so I hope I still like them come next spring!


At last I've found an interfacing for waistbands that actually seems to work. I find proper waistband interfacing too stiff to be comfortable, and most other interfacing too insubstantial, such that the waistband does not really do its job and tends to wrinkle. .. So a bit of advertising for the new favourite, bought online from the US - Pro-Weft Fusible.

Saturday, July 17, 2010

Pantaloons

This is Marfy 2217 (size 42). Ridiculous trousers like these seem to be fashionable. The odd thing about fashion is that things that look ridiculous when they come out seem normal after a while. So I wondered if my judgment was too harsh and since the model in the drawing doesn't look ridiculous, I thought perhaps these might be a more wearable version of the trend.

They were very fun to make. Look at this marvelous pattern piece! The grain lies along the lines of the floor boards. With just the usual minimalist Italian-English phrases jotted here and there on the pattern, it was very interesting working out how they went together. In the end the sewing itself was not hard in that once the geometry was worked out there were no real technical challenges. There are only 3 pattern pieces, legs, waist band and cuffs at the bottom of the legs.

I chose the
lightest weight cotton I could find, since I thought that stiffness and bulk were definitely to be avoided. Here are the amazing results. Marfy should be sued under the trade descriptions act! :-) Whereas the pantaloons make their fictional model looks tall and elegant, I am made dumpy. One might wonder if a heavier drapey fabric, perhaps a knit, or even having a smaller arse would work better. I think not. A few days before I completed the pantaloons, I had the pleasure of walking behind a pin-stick thin woman in the very fashionable Motomachi area of Yokohama. Her pantaloons were heavy and drapey and swung around back and forth as she walked in the most unflattering way. And yes, her bum looked enormous. If the tiny pert Japanese bum is made to look fat by this trend, there is no hope for the rest of the world.

Nevertheless I have been wearing these almost every day - as indoor only lounge wear! Although I'd prefer they had a higher crotch so that movement was not restricted, the super lightweight cotton is excellent cover for these super hot and sticky days of Japanese summer, and the baggy design allows for good airflow.

Sunday, June 13, 2010

New Pet!

At first we thought it could be fun to get an iPad. Then James discovered that the data plan for the iPad was very cheap compared to an iPhone. From there it was just a short step to wonder if a standalone dataplan could be the best of all. No need to buy an iPad, I can end my iPhone contract but still have mobile internet access through the iPhone wifi (I don't use the phone anyway), James can access the web from his iPod, and we can both connect to the internet from our laptops while away at meetings (public wifi is not that common here).

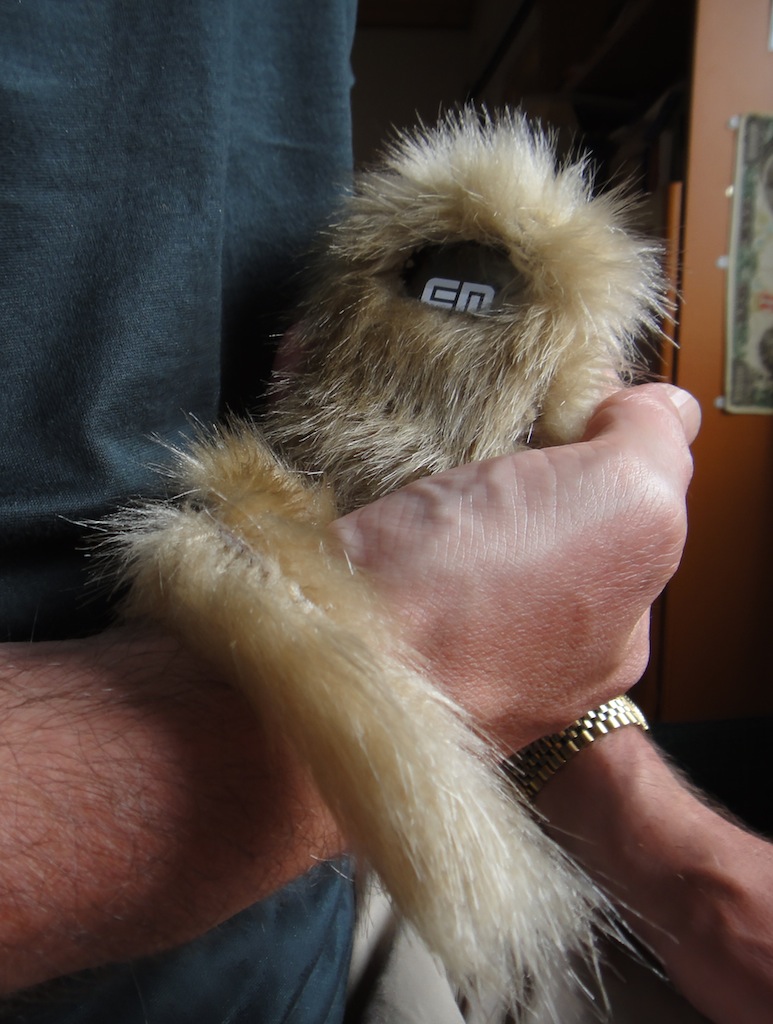
Enter, "Widget", our new EMobile wireless 3G device. We decided not to pay the pittance each month that partially insures the device, so given it's smooth shape and the requirement to handle it on the move, a case was required. Thanks to the fur class I took a little while ago, he's furry, with a tail - and a personality! He is all hand-stitched, and I also had a really fun afternoon creating him.