Sunday, April 08, 2007

green frock update


Due to too much travelling and recovering from travelling I have done hardly any stitching recently - only preparing the pattern pieces for a go at View A of Vogue 7856 in velvet! It has 11 pieces and I have 2 rather short lengths of 2 different velvets to fit it onto. I anticipate a lengthy process.

However, here are some slightly more proper green frock pictures with the arm with a stitch in rather than with shoulders poking through. It is now just about warm enough to strut about outside dressed like this, for a few moments. And I bought some shoes. Hate buying shoes, but didn't have anything suitable.

Thursday, March 22, 2007

Stitchin' makes you rich and famous


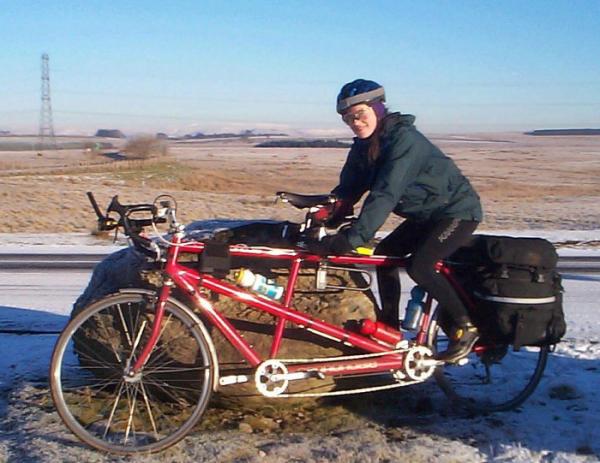
I bought the Pertex for James' cycling shirt and trousers from Textile Outfitters. At some point during email correspondence about seam sealers they requested a photo form me, and here it is on p11 of their 2007 catalogue! As if the fame itself were not enough they also gave me a coupon valid for several months valued at the princely sum of $25 (Canadian).

Sunday, March 18, 2007

New Look 6370 is a fairly short frock intended for lightweight and possibly sheer fabrics. View D. I bought this pattern more than a year ago, and then bought some fabric for it. Then realised my tricky-fabric skills were non-existent so I took Sarah Veblen's sheer fabrics class in order to be able to make the dress. The pattern is labelled easy. But it is not easy or fast making a bias frock in a slippy dippy lightweight fabric! Key thing I learned from the sheer fabrics class was pick an easy pattern and to take time to make the fabric behave properly.

Mock Up

The practice was made in cupro (a rayon like lining fabric) and is basically slammed together - took me a long day from starting cutting out - none of the seams are finished or the arms hemmed, although I did get round to making the adjustments on the pattern pieces. My new sewing machine helped a lot too because with the clever acufeed system I didn't need to baste before stitching.

For the practice I cut 14 top and 12 from waist down in line with the measurements on the pattern back. I have adjusted this considerably. I took up the shoulders 2cm. I decided to also lower the underarm and bust dart by 1cm. I took in in 3.5cm on both sides at the bottom (ie 14cm total!!!), about 3cm at the waist tapering to nothing around the underarm. I've also reshaped the back to allow for sway back. I stuck a tuck in the practice frock to estimate this which can see it in the back view photo. Because of all the adjustments the tie is in the wrong place on the practice (2cm too high). the envelope.

Real Thing

Top layer is a green silk/rayon devore bought almost exactly a year ago from Borovicks Fabrics, Soho, London. The underlining is deep red silk geogette from Sarah Veblen's on-line shop. Both these fabrics feel warm to the touch whereas the lining fabric I used for the practice frock feels really cold.

I don't think I made too many mistakes the second time around. The only problem really occured during construction of the neckline. The final result of the neckline lies much nicer than that on the muslin (partly because it was stitched much more carefully). However, I was rather shocked after stitching it because the back of the neckline was all baggy. Seemed I had managed to stretch the back neckline while sewing. I unpicked it and took in the top of the CB seam by about an inch. After much basting and trying on and helpful comments from James it seemed to work out OK.

The part I was not sure about was whether to completely sew up the arm/shoulder part. On the pattern the two sleeve halves just flap loose and when I tried on the dress these flaps tended to turn over revealing the underlining a bit too much. So I sewed the ends together. After soliciting the opinion of the PatternReview participants I decided to take an extra stitch in the middle of the sleeve to keep the general effect but lessen the amount the shoulders poke through. The photos are taken before this change was made.

After making the practice I altered the pattern but was a bit confused because I had so drastically reduced the ease. I emailed Sarah Veblen and my interpretation of her advice is that for a bias frock for someone quite small like me should cut with about 2-3" ease, baste together and then adjust. I measured the post-muslin-adjusted pattern and I was down to zero ease at the bust and even negative ease at the hips. Spot the drag lines on the photos of the practice frock! So I added 2cm to my pattern side seams and then cut out and basted the CB and side seams. I ended up not taking the hips in at all from this but taking the 2cm back out of the bust. Sarah's other advice was to "go with the flow", which I interpret as not trying to force things together that don't want to go, but letting the fabric fall/hang where it wants to. I found this very useful advice for all the seam sticthing. For example, the underlining fabric hung longer at the bottom of the dress than the top layer fabric.

For the flounce I made one flounce of top layer devore and another narrower (by about 0.5-1 inch) flounce from the georgette and then sewed them together at the top only. I did this so that the flounce would be visible and yet still be "flouncey". The flounces were hemmed with baby hems. Since the frock is cut on the bias I didn't finish the seams, just sewed them down to the underlining. Because of the multiple layers and the way they liked to misbehave, this time I did baste most things before stitching.

It is interesting how differently the frock hangs in this fabric combination than in the lighter weight less bias-stretchy muslin. As well as the quite large differences in the width fit, I had to take it up a bit at the back hem, and it still hangs a bit lower than the muslin.

This is a good pattern for sheer fabrics on the bias because it is basic with few seams and the flounce adds a bit of interest withought being too hard. It took me a lot of days to make this but I only had the odd hour here and there to work on it. Worked quite well since it gave the frock time to hang out and me time to consider the next move between sessions.

One might have to be a bit careful how one sits down in this frock.

review

ミシン settings:
90 weight thread; bobbin tension 0.5 turn left (~minimum).
Devore alone - FP=2, 1.7mm str. stitch, 3 step zig-zag W=2.5mm L=0.8
Charmeuse alone - FP=3, 1.8mm str. stitch, 3 step zig-zag W=2.5mm L=1.0
Devore, Charmeuse together - FP=1, 1.8mm str. stitch

Monday, February 12, 2007

jules' jeans #2

First thing with new mishin!

New machine is supposed to sew through anything. So what better to test it on than denim? This is a repeat stitchin' of Vogue 7481. This time I used much thicker denim and attempted some of the topstitching details. What I really wanted to work on was the fit. As well as seeming too large at the front crotch, the previous pair we slightly loose when finished and are even looser now. So I made the pattern alterations that I had noted last time: I took an inch off front waist, tapering to nothing at the hips, and then took 5/8" off most of the outside of the legs. Then I took a cm off the front inside leg all the way down. I then redrafted the waistband to taper more towards the waist. I'm not sure I got the grainline correct on both waistband pieces - the left side looks kind of wrong on the finished garment.

I'd already washed the fabric 3 times to pre-shrink it (it is what they advise for denim). Then I cut across the grain at either end and attempted to lay it out. The fabric was about 4 inches off grain! I do wonder if I made it do this by stitching the ends together before washing it (to stop it fraying). Perhaps one ought to try and straighten it while wet? Or after it is dry? Anyway I did neither of these. Instead, with James' help I laid the selvages on top of each other. The ends were about 4 inches off, but the fabric was lying very happily with a nice flat fold -- if you fold fabrc off-grain usually the fold will not lie flat. The fabric was also already showing another irritating characteristic of picking up bits. I thought I may as well carry on since the main aim was improving fit.

So I cut out and then I basted it all together in no time, using my new machine, on which it is possible to sew long stitches that can be easily pulled apart. The result certainly seemed tight!, but I've heard often of people sewing jeans which then stretch in wear that I thought I should not adjust it but carry the experiment through. I think what I failed to take into account was the extra bulk taken up by this thicker fabric which makes them tighter compared to the previous pair. I took another cm off each side of the legs below the thigh because they really did seem too baggy especially when compared to the tightness of the top. This change needs transferring to the pattern.

To test the new machine I bought some #20 thickness "jeans stitch" thread. I had wanted very dark red but it didn't seem to be available so I got an orangey instead. I wanted to be able to see it clearly to see how good the topstitching really is. I think this thread is thicker than one usually sees in RTW jeans so probably one could just as well use #30 thread which is available in a huge range of colours. Anyway, yes, the machine stiches merrily through 8+ layers of denim. I even made flat felled side seams and the new machine and new iron just made it easy. The only thing I didn't feel confident enough to do was the double row of topstitching round the fly. Perhaps next time... For the hems I copied my RTW jeans and did a double folded hem (2.5cmx2).

I haven't done any of the details like the belt loops, or the yoke and pockets of the other views. I suppose having belt loops might be useful if/when the jeans get looser.

At present they are certainly tight round the bum, but not tighter than pairs of jeans I have bought before. I am waiting for several round of wearing and washing before casting a verdict...

review

atarashii mishin

On the evening before Memorial for Broken Needles Day a new sewing machine arrived.
The day before, the iron stopped working so later in the week I bought a new one of them too! As you can see the new equipment is all huge and built around an icy blue theme.

The sewing machine is a SuperQuiltDX made by Janome, a Japanese company, who are also the world's largest manufacturer of sewing machines, partly because it also manufacturers a lot of the machines sold by other companies. Or does it own the other companies? I am not quite sure... I bought the machine for a lot of money (205,000¥) from Janome's local dealer in Fujisawa. I could not find this machine in any more usual shops (like the big electrical stores which, surprisingly, mostly seem to sell rather old models), on the web or even at the specialist stitchin' shops. I was so impressed with myself for finding the dealer only a 20 minute bike ride away that I wasn't going to waste time shopping around for a cheap deal!

Anyway, the SQDX is the Japanese version of the 6600, which can be found in places like Europe, Australia and North America. The only differences (as far as I can tell) apart from the casing colour and language details are that my version doesn't stitch alphabets and also has slightly fewer decorative stitches. One of the cool things about the machine is the oodles of space to the right hand side of the needle. As you can see, this allows one to more easily enjoy a nice cup of tea while stitching. The Janome 6500/6600 have their own yahoo group!

The iron is a T-Fal (or Tefal depending which country you are in), and its most amazing feature is that it flattens things. My old iron did not do this. Reminds me a bit of our old vacuum cleaner which did not pick up dust. At least my previous sewing machine - cheapest Brother that did not sport Mickey Mouses on the casing - did actually do stitchin'!

Wednesday, February 07, 2007

green T-shirt for James

In September 2006 I took a Tshirt class (on the web) and stitched a couple of samples. I have several bits of fabric to carry on with this but have been rather slow getting a round tuit. The only one made so far is a light weight dark green version for James. I had to add a little width at the chest compared to last time when I used a 2-way super-stretchy fabric. In this case the error was found after I had stitched the side seams so I took them apart and added gussets at the underarm. I've altered the pattern, adding a somewhat generous amount of extra width all the way down the side seams. I have some nice fabric for another T so don't want to mess it up by cutting it too small. I can always baste it together and then sew the sides with a bigger seam allowance. I followed the class instructions for self ribbing which it seems to me produces a rather too tight neckline. I am waiting until the Tshirt has been throught the wash before passing a confident verdict on this. Possibly it will settle down just enough. There is enough fabric left to make a T-short for jules...


again - no piccie yet!

heavy cotton baggies for James

I have made in total 3 pairs of cotton baggies, and even have possible fabric for another pair. Because James is so tall he looks good (I think) in these things. However, he does not look so good in the baggy-knees sweatshirt-fabric trews he insists on wearing at home all winter. I was wondering what to do about this. Then I found a kind of ethnicy weave of rather thick cotton in the local store in Kamakura. I accidentally didn't buy enough so James had to go back with a swatch and buy some more. Only by then (a week later) they had cut the remanants up into 1m lengths! I had realised that if I see nice fabric I should buy it there and then but I hadn't realised quite how quickly it gets sold. Kamakura is obviously a stitching hotbed. James bought two 1m lengths and then I spent quite a while sewing them accurately together (being the sort of person who struggles to stitch in a straight line, this was a bit of a challenge). I was concerned that with this thick fabric even tall-James would start to look dumpy in these but turns out that the strong vertical pattern cancels out the effect.


The problem of what to do with the two ~50cm lengths left over from the purchasing error has just been solved! While writing this I kicked over my coffee cup and the smaller scraps came into service to mop up the spill. Very effective. Ethicy tea-towels then..

Pixie and shroomie

James has a silly hat which he used for cycling in the winter. But it is not warm enough (see previous post on fragile men). So I took some of the remains of the Polartec 200 WindPro fleece used to make the muslin for James' cycling fleece (which BTW has become very popular as a really warm fleece for taking mountain climbing in the winter), and roughly based on the not-warm-enough hat I made a pixie hat for jules and a mushroom hat for James. I wonder if the styles will catch on.


Somehow I doubt it by nevertheless the hats have been very serviceable this winter.

more jim jams

James said he wanted more winter jim jams. I was a little surprised since he already has 2 other pairs as well as the ones I stitched last year, and only needs 2 pairs for winter. But apparently one pair are too old and smelly and the other pair too small! So I bought some brushed cotton from Yuzawaya in Kamata. I decreased the width of the legs by an inch (ie 2 inches decrease in circumference) and otherwise stitched them the same as last time. Something I didn't mention on the blog last time is that the legs are too long. At least I had to stitch a large hem and I noticed that the first pair also have a large hem. It would be good to adjust the pattern to take a couple of inches off before cutting these out for a third time.

The clever part of making these jimjams is that two pairs resulted. I did have plans to make some nice PJs for me having ripped one of my two winter pairs last year - but I found that the rejected "too small" pair are in excellent condition and can be made to fit a jules! After all it is better to have PJs too big than too small. It is interesting how much warmer men's PJs are than women's. Now I understand that it is men who are the fragile sex!

jules' jumper in blue

I made Burda 8291 again only this time I made View A. Kind of. It is just the hoodie without the hood and in a less sporty fabric. I used a self-binding for the neckline. I thought perhaps that with the wide neckline it would be good for wearing over shirts. The fabric is a soft medium weight knit made of wool, tencel and lycra (IIRC). It is a bit clingy so not so good for wearing over shirts made from crisp fabric! Also it feels like the sweater is slightly bigger this time even though it is made from the same pattern pieces. Interesting how the choice of fabric can affect this - this fabric is thinner with less stretch recovery. My instructions said to cut 1.5 inches width for the binding but with 5/8" seam allowances this was really too little (2" would have been OK) and I ended up handstitching the backside of the binding. The only interfacing I used was lightweight interfacing on the neckline. This seems to help stop things stretching out of shape.

The only alteration to the pattern pieces was to smooth off the area near the hem a little so that it wouldn't flare out. That worked out as hoped I think. I used stretch thread and a small zigzag stitch for most of the stitching.

Sunday, January 07, 2007

V-neck jumper for J

This is a fluffy raglan V-neck jumper made from a lovely soft wool/angora/lycra mix knit bought from Yuzawaya in Kamata. Angora wool comes from angora rabbit fur but mohair is what you get from angora goats. I suppose this is probably the rabbit version, but I am not totally certain since Japanese use of foreign words is not always related to the common usage in the foreign tongue.

This is a repeat sewing of KS2561. This time I made View A which is a short sleeved V-neck T-shirt, but using the long arm pattern from the previous sewing. So all I actually changed in the pattern used last time was the neckline. I tried very carefully to do it correctly but somehow it ended up with the V right overlapping left, which is not the manly way, apparently. Other than that the V came out OK.

I interfaced the neckline with lightweight interfacing for knits and also basted lots which probably helped things not get stretched out of shape. The fabric was quite stretchy but without good recovery. I used steam with very light (or no) pressure from the iron to shrink it back into place. I've seen it often written on PR how easy it is to reshape wool using steam but had never experienced it before. It certainly is a nice quality of the fabric. I used the almost invisible hand hemstitch that I learned from Kenneth King's tailored jacket CD to stitch down the seam allowances inside the V-neck since I thought that if I tried to machine topstitch it, it would be bound to stretch, and I didn't think leaving the SAs hanging as recommended in the KS instructions was likely to be very satisfactory in this somewhat chunky fabric.

The kerfuffle came with trying to get the arms the right length. On the previous shirt I shortened the cuffs during the stitching process. I should have adjusted the arm length on the pattern at the time. Anyway this time I ended up cutting an inch off the bottom and stitching 5/8" seam allowance on the cuffs (the rest of the pattern is 1/4" SA). I have now adjusted the pattern and taken 1.5" off the length, so next time the cuffs can be inserted with 1/4" SA and it should fit perfectly!

It is interesting how easily the long sleeve T-shirt pattern has become a jumper, but then I suppose it was quite a baggy T. I did not intend the jumper to be quite as warm as it is. The fabric didn't seem that thick to me in the shop. Perhaps it became more dense through pre-washing, or perhaps I am just not very skilled at judging these things.

review

Monday, January 01, 2007

Ultra-cool bizz part #3

PHEW! If anyone actually ever read this blog they'd be thinking I'd given up stitchin' but here, at last, is what I have been toiling over! I wouldn't like to try to add up how long it took!


This is the jacket of the Vogue loose fitting men's four piece suit (ie jacket, waistcoat, trousers and shorts!). We sometimes attend parties that specify "lounge suit" as the dress code. Almost all the men turn up in black suits which is very dull of them. James' other suit is also black and more suitable for a Scottish winter than a Japanese summer. So now he has something jolly to wear instead.

I think the Vogue instructions were OK, although there may have been a couple of mistakes. For example, I didn't see where the lining arms are attached to the body. On the whole I did not follow the Vogue instructions, but those of Kenneth King's (hereafter KK) Tailored Jacket CD book instead. I followed the Vogue instructions for the pockets and for checking that the hems allowances were going to work.

Originally my intention was to use the Vogue instructions but I became an instant convert to tailoring when I discovered just how much the fusible interfacing altered the fabric. I also didn't want to mess up the breathable hot weather qualities of the tencel fabric by glueing some interfacing to it. It really seemed to defeat the object and was clearly going to add weight. The Vogue instructions have you fuse all the body pieces right at the start - and this was the point at which I booted up KK's CD full of instructions. The instructions in this CD are excellent on the whole. They are incredibly detailed step by step instructions. I had a couple of occassions when I couldn't see KK's geometry for a while but I think I got it in the end. The only fault with the book is that it seems to think that a jacket can be knocked together in a "long day". Bah humbug! It takes days and days and daysssss...

My version is, however, not a properly tailored jacket. Mine is meant for the heat of summer and jackets here that made to cope with Japanese summer (I've been to the shops to check) are really hardly interfaced at all. Indeed sometimes they are almost transparent. Husband also desired a very soft informal and crinkly looking jacket (he says he wants to look like a rhinocerous) rather than smooth tailored lines. So I didn't make shoulder shields or use canvas in the interfacing. Instead I used cotton batiste for all interfacing. I made the shoulder pads using a mixture of the Vogue pattern and some instructions I found online.

My version looks softer than that on the pattern picture due to the different construction methods employed (sewn in interfacing vs fusing). The pattern went together fine so I don't have any complaints. Of course not all the dots lined up exactly with the KK instructions so there was a bit of guesswork and it didn't turn out perfectly. For example, the (KK) piping in the lining should have gone lower down.

Following KK's instructions I really like the way that the jacket was shaped. It is amazing - the finished article has this incredible lapel that lies in a beautiful curve even though the fabric is really soft and no firm interfacing was used. All done by steaming things in curves and basting with silk thread. I don't have any hams or a sophisticated iron or half the tools required by the CD. I managed with a normal iron, a towel and a sleeve ironing board. The tencel is pretty hardy stuff and survived the trauma of my inexpertise! The let downs of my construction are the buttonholes which are not the sort with the nice curve at the end. My machine only has one sort of buttonhole - the straight 4 step sort - I have experimented on scrap cloth with making them by hand but they look awful so I just did the machine ones, which aren't that great either!

Apart from that I made plenty of mistakes like not realising that the piping should all be done in one long piece, not realising that I should have drafted the under collar and front into a single piece before cutting out, and accidentally snipping bits of fabric when I was supposed to be cutting threads, and stitching wonky seams and not getting things to line up properly. I have a similar feeling to when I made the Vogue trench coat which also had a lot of steps - with one mistake in each step one ends up feeling like the whole thing is just a load of errors. However the trench coat has held up really well with only a couple of small repairs so I am hopeful that the jacket wont just unravel the first time it is worn.

Fabric Used: Green Tencel for the "fashion fabric", red and purple bemberg lining (which KK hates!) and cotton batiste for the interfacing.

I made a muslin out of muslin in size 40 and then added an 1.5cm to the arm length and half an inch width at the underarm, tapering the arm to the normal cuff size and keeping the excess all down the side seam of the jacket.

Even now, only an hour or two after finishing it I think I would sew it, or at least another tailored jacket again. It was really quite a lot of fun. I do feel quite a sense of acheivement at having done a jacket almost properly! My technique of not bothering too much with the multiple mistakes and instead thinking "I'll do it properly next time" does make me want to do it again better.

Shoulder pads:
Here are some instructions for making shoulder pads. I also had the Vogue shoulder pads pattern, but since it was for ladies shoulder pads I thought it wise to take measurements from the jacket muslin. I used non-fusible cotton batting for the padding. 4 layers - one for each of the pieces shown in the photo. Then I used a kind of thinner cotton stuff - maybe flannel? using two of the largest pieces. Altogether this made the desired 10mm thickness. I pad stitched all this together in a curved shape according to the Vogue instructions. Then I decided to stick fusible tricot over the outside to make a smoother finish. I am not sure if that last part really helped in the end, although it kept the pads clean while they were floating around the house before the jacket was sewn. I discovered that the important thing about shoulder pads is to have a nice smooth curve at the thick end so that they look smooth in the sleeve cap. Steaming after installation helps to greatly improve this.
review

Sunday, November 12, 2006

FuXXy Legs

Yesterday I finished the James version of the fuzzy legs. The legs seams are looooong. This time I had an idea what I was doing so it was a bit easier. Once again I took apart one side of the oldest pair of these. Making the pattern did seem a bit easier. I think this was because the pieces were a bit bigger and so kept their shape better. I used the same construction techniques as for the previous pair. I did not stretch the elastic so much when measuring it to avoid artificiaaly shortening the leggings (he tried them on after sewing the seams).

Used hot pink thread (by request) so as to make it easy to distinguish between my pair and James' in the closet.

No pics yet - the weather has been very kind and remained quite warm until the fuzzy legs are finished! Although fit is good, both pairs seem tighter than expected. We think this might be because the new fabric has good stretch recovery and is thicker. The old pairs were transparent in parts.

Saturday, October 21, 2006

fuzzy legs

More than 10 years ago James and I bought a pair of Karrimor Slick Rock Bib Tights each. These are cycling bib tights made of Powerstretch, with no extra annoying frills like a cycling chamois or reinforced knees. Powerstretch is very warm and very good at wicking away moisture so excellent for really warm cycling leggings. The bib tights go high up the back too which adds considerable extra warmth.

A few years later we bought new pairs. But they were never quite as good . Mostly it seemed the fit was bad - they had gone very long and narrow. So mine were too tight round the ankles (became OK in time) but way too long. I tied knots in the shoulders. Also the fabric did not seem quite as strong, but maybe that was just an illusion.

We have continued to wear both pairs for cycling through the winter months. That means we don't wear them as many months of the year in Japan as we used to in the UK, but we also take them up into the mountains when we go walking in wintertime. Their fantastic warmth is really wonderful in the draughty mountain huts. I always cool down a lot after exercise and can get cold even on quite pleasant days.

Anyway, I'm not even sure that Karrimor make cycling apparel any more. The only reference to these tights I found was on ebay .
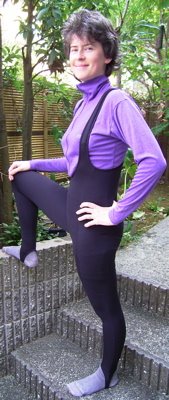
Our fuzzy legs (as we call them) are really very worn out now so we decided last winter that it was time for some new ones. Somehow that means I only have about a month to get both pairs done!

As you can see, I have finished mine. I did them first because they are smaller and therefore easier!

I sacrificed the older pair to make a new pair. I took apart the old pair, but only completely dissassembled one half. Here are the pieces from which I contructed the patterns. As you might be able to see the pieces are very stretched - mostly at bum and knees. I did mark on some approximate grainlines with a water soluble coloured pencil. Then I sketched round the pieces and spent some time trying to make sure the seamlines were going to match. Actually they are not all identical lengths but it seems to me from looking at my pieces that there is also no way the originals can have been the same. Basically there is 2cm length extra on the lengths of the side pieces compared to the inner piece (which is the large piece). The two side pieces do match each other well at their join. The easing of the extra length was not even noticible in this 4 way stretch fabric.
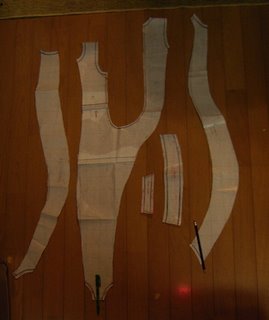
Here's the final pattern. It took a whole day to make! I was amazed how many curves there are. I had thought beforehand that the panels would be straight. I think the final results may be an amalgamation of the Karrimor pattern and the pattern that my body forced the fabric into after 10 years of wear. End result seems to be...a perfect fit!?!

Then on to the contruction. The fabric is the original and best, Powerstretch from Malden Mills.

Most stitches caused the seams to stretch. The small zigzag may have been tolerable since it provided the maximum give in the seam and it was possible to pretty much steam the seams back to their proper shape after stitching, but I decided to use a straight stretch stitch in order to minimise bulk in the seams. I used the stretch thread (Resilon) that is available here (and perhaps no where else?) and a 14 stretch needle (the thread is quite thick at size 50). Previous experience with this straight stretch stitch has taught me that it is almost impossible to unpick but I found that using a contrast thread (I used blue) the impossible became possible.

For the edges, I was surprised to find that the originals had strips of rubber in the hems. I substituted this with something that seems to be called shirring tape. It is basically less bulky elastic with lots of holes in (I used 1cm width). After refering to the PR resources on stitching in elastic, I overlocked the elastic to the raw edge wrong side, turned it and stitched it down with the stretch straight stitch.

I measured the elastic lengths required from the pattern, and then cut the lengths while holding the elastic slightly firmly, to make sure the elastic was going to provide a snug fit.


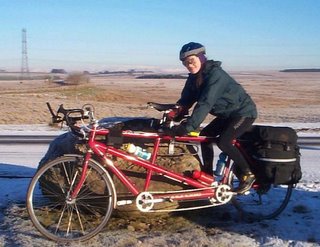
Here is the only picture I could find of the originals in action.
Tuesday, October 10, 2006

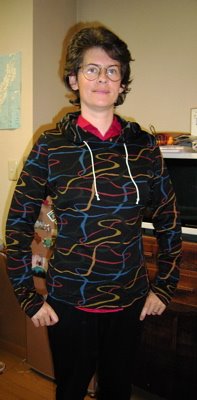
mountain hoodie


Burda 8291 is is labelled easy and consists of a knit jumper with a variety of different neck finishes. I made the hooded version. Apart from the hood and neckline, I used modified pattern pieces from the PR "Build a Better Tee Shirt" class that I took earlier this year, rather than the Burda pattern pieces. My version is not quite as long in the body and somewhat closer fitting than the original.

I was actually attracted by the quite tight looking fit on the pattern photo, although it seems that, on closer inspection, and reading of the other reviews, that the fit is not so close. The thing I most liked about the pattern was that, without too much difficulty, it was possible to meld the hood with the Tshirt pattern I made in the PR class.

The fabric is 100-weight single velour fleece (ie a smooth hard wearing finish on right side and fleece on the wrong side), from Malden Mills prints section. I have had very good wear from RTW jumpers made of this stuff in 200 weight.

I didn't use the pattern instructions except to check how the hood was constructed, which was straightforward. I used the T-shirt class instructions to aid the construction. I used lightweight knit-suitable interfacing on the neckline and I think that was very useful. Interfacing in the sleeve and body hems seems less pleasant to me, although I did do it this time after much testing on scraps of fabric. I also interfaced the hem at the front of the hood which seems OK. I used a narrow zigzag to topstitch down the hood seam allowance and to stitch down the hems since I haven't mastered twin needle stitching (or stitching 2 parallel rows). Haven't looked to see what the Burda pattern suggests for this.
I made quite a few changes to the T-shirt pattern, adding about an inch of ease to the side and arm seams, taking out the CB seam, lengthening the body, slightly modifying the armscye, and taking out the darts. I cut large seam allowances and basted it all together, and then adjusted the fit. The important bit I learned in the class is to bother to transfer the changes on the pattern pieces so that as part of the work, a re-usable pattern is constructed. In addition more small changes can be added in the future so that the pattern can evolve bit by bit.

For the neckline, I made a rough estimate based on the Burda front and back pieces. Then I measured the neckline ofthe resulting pattern pieces and chose a hood size such that the neckline size was correct. I added a cord round the hood front - I am not sure if this is in the Burda pattern or not. For the holes where the cord came out I sewed a bit of interfacing in a rectangle over where the hole was to go right sides together. Then I cut the hole and turned the interfacing to the other side and ironed it down. Wonder if it will fall apart during laundering.

I intend to sew this again, but will wear this one for a bit first to see how much ease to go for. In fact I already have some fabric which is more fashion fabric than sports fabric so will be interesting to see if it works out. I think that using the tshirt pattern as the base enabled the final result to be much closer to what I had envisaged than had I started with the Burda pattern pieces. As well as being a fun hooded top, it is also an excellet perfomer - took it up the mountains this weekend. It is very good at wicking away moisture, and I appreciated the extra warmth of the hood.

review