Monday, May 08, 2006

Dungarees

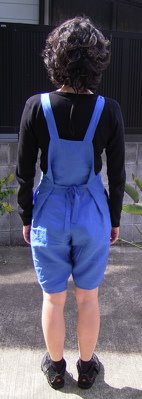
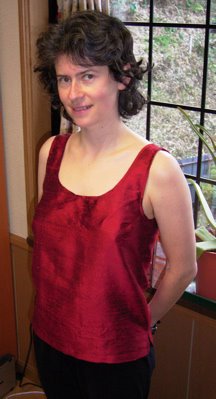
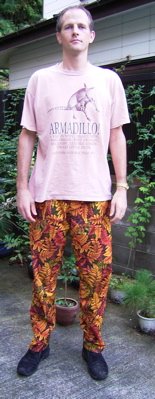
Kwik Sew 3270 dungarees.

I cut size S with a half inch shortening at the upper "shorten here" line (because I am 5'4.5" rather than 5'6"), and I cut the legs short too, for reasons of style!? I cut them quite roughly to about knee length but then worked out the final length by trying them on before doing the hems (which is the last step).

I think dungarees often have buttons at the side to enable a closer fit in the waist to bum area. Not so with these, so, unless you use a fabric with stretch, you have to make them wide enough at the waist for you to get your arse through. This potential drawback is saved by there being a belt at the back, which you can use to make a nice fit round the waist. Since you end up taking in quite a bit of fabric round the waist this way, I wouldn't recommend using a bulky fabric like denim for these dungarees. In a lightweight fabric the resulting loose fit gives a pleasant summery "airy" feeling. Those of you who also have to suffer 35 Centigrade 100% humidity summers will understand why this is a good thing!

I used Irish Linen purchased from one of those fabric stores in Soho (can't remember which one) in London. The linen was moderately expensive and is the most on-grain fabric I have met. I pre-washed it and when I laid it out to cut it out it lay beautifully on grain. I don't know if this is a feature of linen in general or if I was lucky and got a particularly good piece.

Linen creases up a lot, but then I think that is fine for dungarees, which are perhaps enhanced by having a utilitarian look about them. The photo is taken deliberately unsmoothed just after cycling into town and back for lunch, so you can see how scrunchy they go in action.

I also made the legs more narrow than the pattern, by about 3.5 inches at the base, leaving the crotch/hips position unaltered and interpolating in between. They would have been pretty baggy at full width! Since I knew I was going to be taking them in rather than letting them out, I worked out the change in shape of the legs by pinning the garment together, and then marking the new seams with a fabric marker after cutting out the pattern small size. I then sewed along my new drawn on seamlines and trimmed away the excess seam allowance.

James couldn't understand why I could possibly want to make these but now he thinks they are fun. I had always wanted some dungarees so I got this pattern and then wondered for a long time what to make them out of. Suddenly realised that old-fashioned linen was ideal for old-fashioned dungarees. It was lucky since I didn't have the pattern in mind when I bought the fabric on a recent trip.

review

Tuesday, May 02, 2006

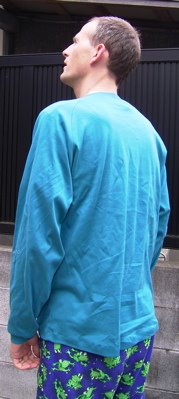
A pretty shirt for James

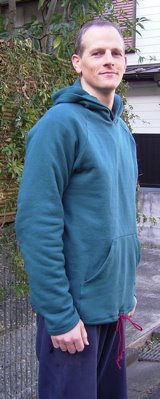
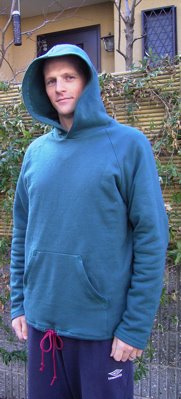
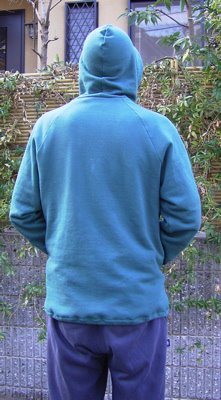
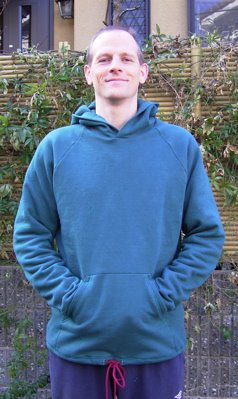
At this time of year James always wears the same long sleeve t-shirt, which, 10 years on, is faded, stained, mishapen and has several rat-holes in.

So last Saturday an excited James came with me one of our local fabric stores to choose the fabric for his new longsleeve t-shirt. The result was that source of argument between husbands and wives everywhere - a shirt that he thinks is blue and I think is green (AND it was being sold in the green aisle of the shop!). Anyway, the fabric seemed to be quite nice quality interlock, although I was less sure after washing it, when it wouldn't lie flat to be cut out! It is quite stretchy but does not have great recovery. I stitched it very carefully, making sure not to stretch it. The result seems OK at present. Time will tell how well it wears.


I made this shirt from KS 2561 and I cut a medium size, which, the pattern stated would have a chest width 2 inches less than the jumpers I stitched recently for James. This would be OK I thought. I also checked against his old longsleeve tshirt and it seemed close enough.

I added 2 inches to the sleeves but then took a bit off the cuffs because James didn't want so much cuff. I also tried to correct for the fact that James' shirts always appear higher at the back than front by adding an inch to the back. Seemed to work OK. I didn't change the pattern any other way (except to mak ethe base 1 inch narrower than the chest), so I guess this shirt would be rather long on more average sized people. The collar is perhaps slightly wide on the finished article but everything else is OK. I was impressed that I managed to get the collar and cuffs to work - this was my first time with the quarter and stretch routine and I was a bit nervous, especially since I used self fabric rather than ribbing for the cuffs/collar.

I used a size 11 stretch needle and thestraight(ish) stretch stitch.
Didn't finish the edges because this sort of fabric isn't supposed to need finishing.


Review


Monday, April 17, 2006

Asymmetrical skirt

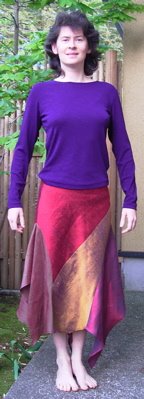
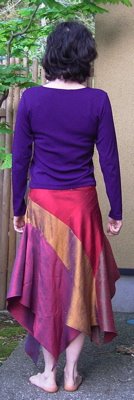
This is Vogue 7856, which is an asymmetrical skirt. It's supposed to look like that!

It is flows in interesting ways which is rather hard to show on a non-video blog, but here are three views to make up for it.

I thought this would take much longer to make than it did, because it has quite a lot of pieces at interesting angles, but actually the cutting out was the trickiest part with the large pieces cut on the bias meaning I had to move James into the kitchen cupboard in order to make room on the floor.

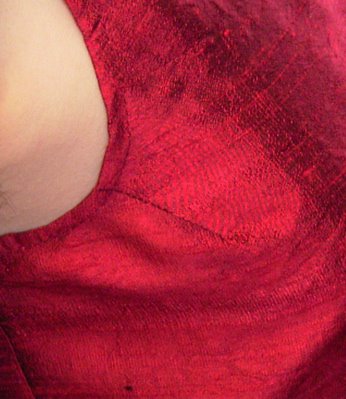
I followed zipper installation guidelines from www.fashion-incubator.com, although I didn't follow them as far as the order of stitching the facing in. It would have been easier and worked better if I had. I also have the zipper just a little bit too high, making the hook and eye a little crowded with the top of the zipper. I also hand stitched rather than top stitched the zipper because the fabric changes colour halfway down the zip (red to yellow) and I only had one colour of thread (red), so I wanted the stitching to not be visible.

I used the clever idea someone on one of my reviews suggested for sewing very fine fabric with a zig-zag stitch, which is to lay newspaper underneath the fabric while stitching. This worked extremely well, although removing the newspaper was a bit of a pain. Without the newspaper, the zig-zag stitch pulls the fabric quite badly, no matter what tension setting is used.

I used dupioni silk in 4 different colours from fabric.com. I cold pre-washed the fabric, which makes it much softer and with a more gentle sheen, and this also means I wont have to get the skirt dry cleaned.

I made size 12, and this is probably slightly too big, but the advantage is that the skirt sits well below my waist. I find skirts that do up below the waist much more comfortable. The flip side is that the skirt probably hangs a little low. I also am shorter than the pattern assumed 5'6". I didn't make any length alteration, which perhaps I should have, but luckily the lowest corner of the hem does not touch the ground. The highest part of the hem is above my knee - the hem really is very uneven! I straightened the curve from the waist to the hips since I am not curved like real women are.

review

Friday, April 14, 2006

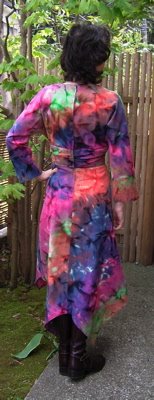
A colourful frock for jules

This is Vogue 7820 which is a 3/4 sleeve 3/4 length dress for woven fabrics, claims to be "very easy". I made View B which has an uneven hem.

My pattern was size 12-14-16. I didn't measure the pattern before cutting, but went by the measurements and cut a petite length, size 14 at the top tapering to 12 at the waist and then size 12 below that. Ended up taking in 1.25 inches in the back seam towards the end of the work.

Even though this is labelled as Very Easy Vogue, it is actually much more complex than any of the Kwik Sew patterns I have tried. I didn't think that it was particularly more easy than the Trench Coat I made, which was also a Vogue pattern. Anyway, it seems to me that real difficulties with a pattern are often caused by use of a difficult fabric - and that's where the real skill is - in knowing how to handle the different fabrics. Sadly that is also a skill I don't have much of.

This is my first woven dress and I sewed it fairly quickly because I just wanted to see how it would turn out. The instructions were all clear and followed logically, and involved a few things that I hadn't tried before. There were lots of gathers round the waistband and also several bits had to be eased to fit. Then there was the small double hem on the bottom, which was a new technique for me.

My impression is that Vogue patterns are much more a work of art than the Kwik Sew ones, which tend to be quite shapeless - although it could just be that I have chosen the shapeless designs - ie sporty sweaters for James.

I used a cotton print from a shop in Tokyo. I thought it was nice! I liked the random diagonal pattern whcih I thought would give the frock more interest.

I am starting to think that "fitted" RTW clothes are too tight across the back for me. The clothes I have sewn for myself look like they fit, but are still comfortable and don't restrict movement! An alternative conclusion would be that Vogue patterns are drafted more cleverly than RTW. I have the same freedom of movement experience with the Vogue Trench Coat.

My Aunty Gloria (who lives in the fashionable South of England) said she thought this frock was "very fashionable". Wow! Some people think it is "Japanese" looking. Well OK, the fabric is Japanese, but the pattern sure isn't. Timmie Lenton, the famous winner of the Very Clever Not So Old Persons' prize at the EGU this year told me I looked "very bright" and accused me of trying to distract him with the glare from it when I wore it to his Medal Lecture. I don't know ... it seems that if you like bright colours and then go and make your own clothes out of fabric you like then people (who, let's face it, mostly like to blend in by wearing fawn, grey and olive) are going to make comments!

review

Saturday, March 18, 2006

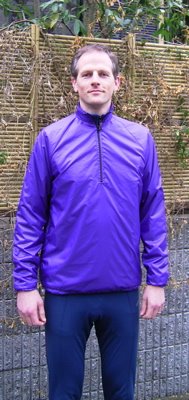
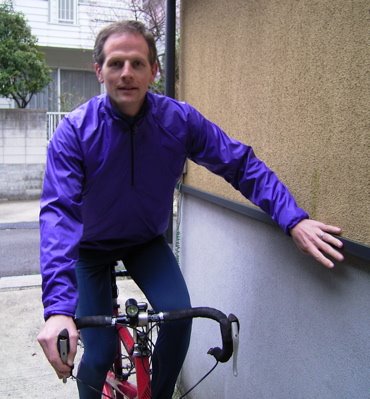
Pertex cycling jacket - the real thingie!!!

Despite already having worked out all the pattern details, it still took me a week to make the Pertex version of the cycling shirt.

The only change in the pattern from the fleece version was putting a bit of extra seam allowance on the sides at the bottom of the back to make the casing for the elastic work properly.

Pertex, unlike fleece, has no stretch, which slightly changes the characteristics of the finished garment. I am wondering if I should have added a little more wearing ease but really it seems to fit very well - it is just a little bit tighter than I expected when being taken on and off.

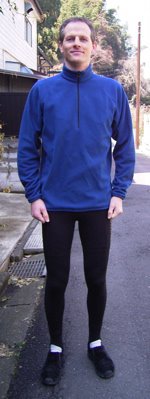
In these pictures, James is wearing the cycling fleece version of the shirt underneath the Pertex, so I guess that means it is big enough!

Anyway, it seems as super as hoped, but it was jolly hard work to make. Apparently the game with sewing things like Pertex (and Goretex etc) is to make as few holes in it as possible.I am too rubbish a sewer to not baste things like the top stitching round zippers, and I did use a few pins. To boost my low stitch-impact rating I used a fine needle (#9), fine thread (#90) and the long stitch on the machine, and I did not rip a single line of stitching! The last part meant I did spend quite along time making sure things were looking OK before actually stitching. I also handfinished the threads rather than backstitching since on my machine at least backstitching on a fine fabric just makes a dreadful mess!

Pertex is very thin and very slippery and it also frays like anything. I ended up finishing the sides of the pressed open seams with the small zigzag stitch since anything else rucked up the fabric. On the seams which could be closed I used a magical iron togther Japanese seam sealing tape and then could finish the seam without the rucking problem. I used Pritt stick to temporarily secure the interfacing (around the zippers) prior to sewing, since using a hot iron or a steaming hot iron did terrible things to the fabric.

I should have done the inside of the collar more carefully, making a proper hem before topstitching the zipper, but with the 5/8" seam allowances I had enough fabric to make a sort-of hem which seems OK - the pattern leaves an edge just overstitched which didn't work very well in Pertex.

I handstitched quiet a few areas - cuffs, bottom, round the zippers, to get the still rather ragged zig-zagged edges tucked out of the way, so that no ends would be hanging out, or hanging into the zippers.

I didn't pre-wash the fabric, but we hardly ever wash our Pertex jackets anyway, so at least if it ruins when washed it wont be for a while.

Review

Saturday, February 25, 2006

trews and tops for jules

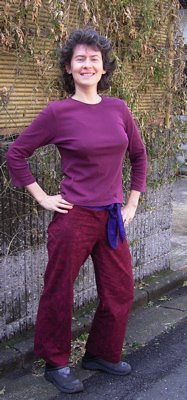
This is Kwik Sew 3243 ( Misses Pants, Shorts & Top).
I made View B in the trews and then View A in the top. The trews were much more successful than the top, which is like a pillowcase with holes in unless you do some major alterations.

The trousers were a pleasent no-brainer to put together. I used some cotton print which is probably used for making quilts or something. Anyway the shop in Tokyo had about 50 different colours of this stuff so I chose two contrasting colours. I used the all in one stitch and finish stitch on my sewing machine which made for very quick work.

I cut XS, knowing that I was not after such a super-baggy fit as the pattern seemed to want. See review for the other details of the fit. In order to make these full length the need another
inch or so adding since at present they have no hem. I have not quite decided what I think of these trousers. It is still too cold to wear them outdoors here. I might try another pair in some of the silk.


update 26/-2/2006:
I did make them in silk! Added 2 inches to the length, made little side slits at the bottoms and a 1/4" hem.


Now for the top. It is pretty rubbish since it is a loose fitting rectangle made in a woven. What I learned from this little project is that this sort of thing would be better either with some sort of fastener that allows a more fitted style, or in a knit with some stretch. So this is why all my vest tops are knits...doh!

In order to make it wearable I added a humungous dart up the back and also small darts at the bust.

Well I guess it was fun playing with dupioni silk. The neckline was a bit tricky to keep it flat, but seemed to work OK with plenty of steaming!

review


Pertex Cycling Jacket Part 2: The fleece "muslin"

I combined the fleece top and the hooded sweatshirt patterns and then added some cyclists design features in order to make this muslin for the Pertex top, using Polartec 200 WindPro fleece.

I used the sweatshirt as the base pattern and made the following changes:-

1. Interpolated the collar into the KS2439 collar. Added front zipper as in KS2439. I used a chunkier zipper this time. This required altering the angle of the raglan seams so as to take out some fabric at the shoulders.

2. Added an inch across the back at the chest, tapering to nothing at the bottom. The reason is because the cycling position is a leaning forward position, requiring extra wearing ease across the back. I also kept the arms good and long since the arms are also stretched out when cycling.

3. The Buffalo windshirt has opening side zippers. We wanted the side zipper but without the full opening, so I inserted
exposed zippers (30cm zippers of the less chunky variety) in the side seams, adjusting the tecnique from KS2439 to work in seams. I wanted exposed zippers because I think this is best to avoid fabric being caught in the zipper during sports use.

4. Went to 5/8" seam allowances, to make handling both the fleece and Pertex (later on) easier.

5. Lengthened the
back in cyclists style.

6. Cord elastic in both the cuffs and round the bottom.


Now all I have to do is make the thing in Pertex.

review

Wednesday, February 15, 2006

Pertex Cycling Jacket ... not yet!

The idea is to make a Pertex cycling top for James. His present Buffalo top is ripped from multiple crashes on the tandem. It also doesn't fit properly. Short in the body and arms and too fat round the chest. The collar is also rather useless. The Buffalo top has velcro straps at cuffs and hips(ish) and also side zips.

I think raglan sleeves are the way to go, so I am going to use the Kwik Sew hooded sweatshirt pattern for that. But also I need a half-zipped front plus collar rather than a hood. So I intend to combine in Kwik Sew 2439. I intend to put in pit zips rather than zips down the whole side. Not yet sure what to do about the cuffs.

15th Feb 2006.
Fleece version of KS2439, or jules' first zipper.

Fabric is polartec 200? "cobble cloth" from Malden Mills.

Problems with this top - KS's 1/4" seam allowances don't work with thick fleece because the presser foot pushes the fabric out sideways, leading to uneven seams. Make 5/8" next time.

Sizing is rubbish, but OK for James since he is a giant. This is a loose fitting top, but noone sane wears things that loose. In order to get a good fit cut M shoulders, S+1inch chest, S arms (plus 3" - although +2" would have been better). S width at the bottom edge. Body length M with no extra added. Using standard sizing guidelines this top will drown anyone under 6', and the S size is certainly not small enough for anyone slighter than average build!


The zipper fit style appears to be a perfect replica for the Pertex top so I am happy to have this to practice on. The collar also appears to be just right, but not sure how it will behave in stretch-less Pertex.

Review

Next I have to work out how much (if any) extra ease and length to add to my basic starting patterns to allow for no stretch in the Pertex and the stretched out cycling position.

Monday, February 06, 2006

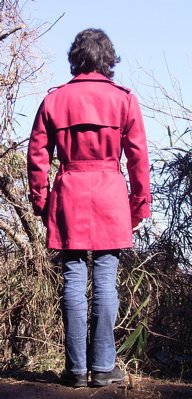
Trench coat V2449


Started 29th January 2006
10th February - finished! hurrah!

This is a learning project. I am using some not very expensive fabric, and making a lot of mistakes along the way, and then attempting to learn from my mistakes. Since the fabric gets holes in when stitched, I have been mostly leaving the mistakes and then moving on to the next bit of the garment to do it better. There are so many steps to this project, that you get lots of goes at doing things right. Here's a list of the adventures.

Fabric:
Cotton gabardine with some sort of water repellency built in. I tried to pre-wash it, but it wouldn't get wet! Amazing! Doesn't seem to shrink when steam ironed. It is deep red.
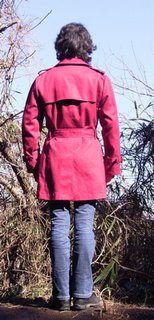


Lining:
Some sort of slippery lining material in dark blue, which turned out to be rather narrow so I didn't have enough for the last two bits of the arms. I am substituting those with Pertex. The construction with the Pertex didn't seem to be a problem, except that Pertex really does get holes in so I used technical-tape (I expect it has a name, but it is Japanese) and steamed the seams together prior to sticthing. The Pertex is noisy compared to the rest of the lining!

Construction:
Sizing - Cut size 14 shoulders, arms and bust and tapered the edges of the pattern pieces down to a 12 above the waist (at the "petite fold line"). Size 12 below that. People have described this coat as tight fitting but it seems fine and I can easily fit a jumper underneath. It is certainly nothing like as close fitting as most of the trench coats worn by the trendy girls in Japan. The way I did the alteration seemed to mess up the button positioning somewhat - probably a higher degree of accuracy cutting out was required too! Still, it works as long as I only button right over left, which is all one would ever do anyway I think. The pattern instructions on the button positions and which sizes of buttons to use where are clearly wrong. I just did it so it looked right and so that button sizes matched buttonhole sizes as much as possible.

The instructions say to clip the under-collar and the pictures seemed to show a cut under-collar - so I did cut the collar - in several places! But I ended up sticthing it together again, and I now think that one is supposed to clip in the seam allowance of the collar - like with all the other bits round the collar where it was clear to clip in the seam allowance only. What a dimwit!

Others have complained that the sleeve in this pattern needs too much easing. I used Gigi's method of stretching a bit of material cut on the bias along the stitching line, and it worked perfectly - not that I know really since this is my first go at sleeve easing, but it looks fine to me. The easing of the lining also worked fine using Gigi's other method, of sticking a finger behind the presser foot to stop the fabric feeding through so fast.

The sleeves remain a bit of a mystery. The 3 (12,14,16) sizes on the pattern all have the same length of sleeve. I measured up and decided they were far too long for me, using the carrier markers as a guide to where the wrist should fall. So I cut the petite length (shortening in 2 places above the carriers). The sleeve lining is marked as being cut much shorter than the sleeve. I now conclude that the sleeves are supposed to have a huge hem, and the lining attaches to the top of that hem. I ended up with quite a small hem and so my lining and sleeve don't meet. I wouldn't have had this problem had I not cut the extra length off the lining, but I still think that had I cut the full length sleeve and used a large hem that the carriers would be two inches too low! Perhaps the pattern indicate the size of the hem, but I didn't notice if so.

Interfacing:
I have two sorts of interfacing, both fusible - a heavy one and a light one. In this garment I have played with putting different weights in different places to see the effect. I put light interfacing on the front facing and upper collar and heavy on the collar band, lower collar, pocket welts and the shield. The shield ought to have a lighter interfacing but he rest seem about right, so far. The other problem is that the interfacing doesn't fuse for long to this fabric, so I should have stitched it in more carefully, rather than cutting the seam allowance completely off the interfacing! Hopefully since this coat wont be laundered perhaps nothing too terrible will happen and the top and edge stitching should have stitched most of it down.

Topstitching/Edgestitching
My topstitching on this garment varies from really rubbish to OKish, as I have slowly learned more about how to tackle it. In this fabric you can't redo a line of stitching more than once since you get holes in the fabric. I found a size 20 thread, which is too thick even with a size 16 needle. Sometimes it stitched OK and sometimes not. I found that testing on a scrap of material after each needle re-threading, and then re-adjusting the threading again if it looks bad, avoids bad top sticthing on the actual garment. (doh!) Another thing I discovered was that curves like the collar corners are much neater, and quicker (when you take into account ripping!) to topstitch by hand. I just leave a long thread out of the line of stitching from the machine and then finish the corner with that. The pattern calls for topstitching and edge stitching all over the place. Without a double needle, my lines aren't parallel. One day I was in the train eye-ing up the girls in trench coats - they must think I am a mad lesbian - and I noticed that their coats don't have the double line - they are only topstitched. After that I gave up on the edgestitching, and everything look so much neater - pity I was so close to the end of the topstitching part before realising this!

Review

Saturday, January 14, 2006

jules' frock

no.6

A stretchy frock. Vogue 2091. This was a supposedly "very easy" pullover frock. Only 4 pieces in the pattern. They say you should buy by the shoulders/bust size for a frock and then adjust the rest. In this case that should have meant a exactly 14 bust and a exactly 12 size for the rest. The upsetting part was that there was a 6-8-10-12 pattern and a 14-16-18 pattern. I bought the larger one, cut a 14, tacked a 14 top, 12 bottom and then tried it on.


And then I changed everything except the bust size.
Shoulders narrowed 6/8" and narrowed 6/8" because the neck seemed gaping and there was bagginess above the bust.

As well as changing the outline - obviously I am not a correctly shaped person - I also had to change the length (and slightly changed the position) of the pleats because I had taken so much off the waist.


The fabric is cotton and very two way stretch. This is why I could not precalculate the required changes before cutting out. The fabric was more stretchy than advised on the pattern. It is fairly firm and quite warm. I think it is definitely better fitted snugly since it doesn't really drape very well. Before I took off all those inches I had strange rucks in all the wrong places. I mostly used the small zigzag machine stitch, with the occassional straight stretch stitch. I used a size 11 stretch needle and size 90 black thread.

Review

Monday, January 09, 2006

jules' jumper

This is number 5.

Kwik Sew 3094 View B. I cut S shoulders, XS everywhere else, but took an inch off the hips and added an inch to the arm length. Decided these measurements based on measuring a jumper I already have rather than looking at the pattern which suggested I was at the top end of S (36" bust).

Messed up the collar by stitching it on with the seam on the outside :-o. Couldn't rip the seam through the weird bobbly fabric and mini stretch stitches so instead I sewed a jeans style double stitched seam. Looks OK since the bobbly fabric hides all mistakes. Otherwise it worked OK, apart from the sewing machine choking on the fabric. I was using a standard size 14 needle. The polyester size 60 thread wouldn't work but some other cheaper thread I have mostly worked, with the top tension increased to 7.

Fabric was black loosely knitted wool with bibbles and bobbles on the outside and only bibbles on the inside. It is nice and warm.

Review

Sunday, January 08, 2006

The 4th thing

A sweatshirt which fits a James!

Kwik Sew 3045

Cut size medium, adding 3 inches to the body and 4 inches to the arms. Also made the bottom an inch smaller than the chest.

Couldn't be bothered with interfacing the pocket edge. That, I suppose, is why it looks a bit baggy after James has thrust his hands in the pocket - but I don't think that "real" hooded tops have interfacing there, so why should mine?

I tried using the overlock stitch but it kind of made the edges fan out, so I also did a straight stretch stitch on each seam. I did two rows of stitching on all hems and the pocket edges - not sure why - I think it looks nicer.

Review

Saturday, December 31, 2005

Project 3 - jules' Bizarre jacket


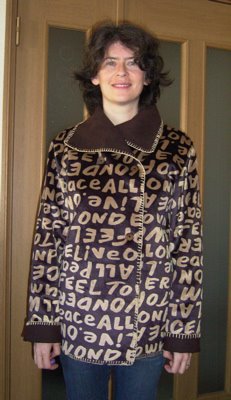
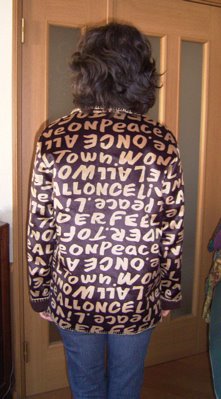
Continuing along the theme of easy shapeless things I bought Kwik Sew 3096, which is a straight jacket. I mean that it doesn't have any shaping. Reviews had said that is was very loose fitting so I cut an extra-small rather than a medium-to-small. Rewiews also described this pattern as dead straight with both hips and bust the same size. I measured carefully and disagree - the hips are an inch wider than the bust in size XS. My hips and bust are actually the same size, so I altered the pattern to make it the same too. I also lengthened the jacket, cutting XL on the bottom. Because of the bonkers fabric I had found I didn't want to make a short wide jacket. It fits delightfully well except that the sleeves are a little short. There are supposed to be 3 inch cuffs, but I wear them at 1-2 inches. I didn't think of that when choosing to cut the XS rather than the S.


Anyway - the bonkers fabric is something I found in a shop in Kamakura. The Japanese have this bizarre habit of wearing clothing with inappropriate English (sometimes French) phrases written on them , so when I saw the brown and tan fur with 2 inch high stupid words on it I couldn't resist. I really don't know what the fabric is for - some sort of home interior - a cover for a kotatsu perhaps? Its 3 layer, fur on the top, a sort of plastic insulating middle layer and a sort of synthetic mock-suede inside. Anyway, I can't be bothered with fleece jackets for outer wear because they aren't windproof. This jacket sure is windproof and is pretty good for cycling around town in the winter. Even better I blend in well in the high street now. ;-)

As for the stitching, I messed up the buttonholes because I didn't want to stitch the reinforcement patch to the outside (cos of wrecking the words on the fabric) so I put them on the inside. Then realised I couldn't stitch them in so they looked good enough through the fur so ended up just trimming down to the buttonholes. I added two extra buttons to the design so that the jacket actually closes properly. My fabric was heavy so it just didn't hold closed with only the inner button included on the pattern. The other problem I had was that I had to tack everything rather than pin, because the fabric was too distorted by pins (and the pins got bent!). After adjusting the tension on the sewing machine, it handled the fabric fine, even in 4-6 layers. I don't have a serger - the pattern is really meant to be an easy serger project. My machine overlock stitch is nowhere near neat enough to finish the edges so I blanket stitched in gold-silk wool, which I expect will unravel immediately. James thinks it it very fitting to not only be wearing a blanket, but to have blanket stitched it too.


Monday, December 26, 2005

jimjams


jules' second stitching project completed today. A pair of jimjams for tall person. Simplicity 7045. Made Large size (should have made Medium but pattern is L-XL), taking an inch out of each shoulder. Added 3 inches to arms (required) and 3 inches to legs (1 would have been enough). Also took 2 inches off circumference of legs (still too wide - take an inch out of each "side seam" next time.). Jacket is OK fit (seems to be long but that is with nothing added to the pattern, so must be the intended "style"), trousers are a bit baggy!


Took the side-seams out, because pajamas don't have side seams, making only two pieces for the trousers.

Review


Monday, December 19, 2005

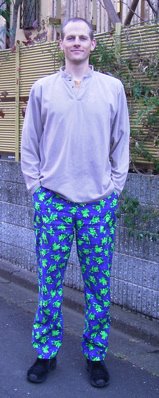
Project #1 - Frog trews


Bought these as a kit from Haan Crafts. Added 1.5 inches to the crotch length and 2.5 inches to the legs, and chose the medium size which was closest to James fave pair of lightweight summer trews that ripped this summer. Next time add an inch or so to the rear crotch length and use more sturdy elastic. Also the back pocket needs to be taller. Of course zipped pockets would also be nice but I don't know how to make them!


January 2006 - made these trousers again, using the same sizing as I worked out before. Did not add an inch to the rear crotch, since we decided that the real problem with the frog pair was that the elastic round the waist needed to be firmer.
Photo to follow - trews currently being worn every day at work!
Cotton print from Okadaya in Shnjuku.

For the pockets:
Copied James' favourite pair of cotton trews to make side pockets and a back pocket. But he says the pockets at the side are not deep enough, or maybe they should have the hole higher up? - this even though they are exactly the same as his previously named "perfect fit" trews! Fussy or what? Instead of a zip pocket (which I still don't know how to do!) on the back I made two little welts, like I noticed on someone else's jacket pocket. I guessed how to do it, and it seems to be functional but is not perfect since the welts overlap a bit.

1st October 2006:
Third pair of these trews. Rear welt pocket stitched more properly into waistband, and interfaced, following zipzops instructions. Welts still a bit big perhaps. Was going to make a zip pocket but couldn't be bovvered to go and buy a zipper. Apparently the rear pocket needs to be deeper. Wallet doesn't fit in properly.

Front pockets taken from Vogue shorts - better shape than before. James says these are now fine!

Topstitched side seams, stitching down seam allowance. I suppose all the practice on the ultrasuede made it seem like the thing to do. After doing it I noticed that some of my own baggy trews are topstitched in a similar way. Ought to have topstitched front of pocket too, but was too late to go back and do that easily by the time I thought of it.