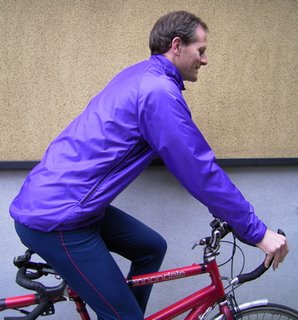
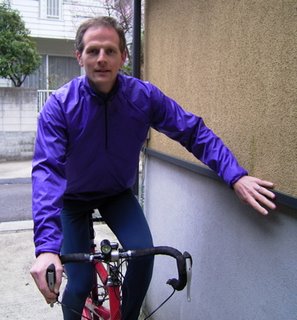
 Despite already having worked out all the pattern details, it still took me a week to make the Pertex version of the cycling shirt.
The only change in the pattern from the fleece version was putting a bit of extra seam allowance on the sides at the bottom of the back to make the casing for the elastic work properly.
Pertex, unlike fleece, has no stretch, which slightly changes the characteristics of the finished garment. I am wondering if I should have added a little more wearing ease but really it seems to fit very well - it is just a little bit tighter than I expected when being taken on and off.
In these pictures, James is wearing the cycling fleece version of the shirt underneath the Pertex, so I guess that means it is big enough!
 Anyway, it seems as super as hoped, but it was jolly hard work to make. Apparently the game with sewing things like Pertex (and Goretex etc) is to make as few holes in it as possible.I am too rubbish a sewer to not baste things like the top stitching round zippers, and I did use a few pins. To boost my low stitch-impact rating I used a fine needle (#9), fine thread (#90) and the long stitch on the machine, and I did not rip a single line of stitching! The last part meant I did spend quite along time making sure things were looking OK before actually stitching. I also handfinished the threads rather than backstitching since on my machine at least backstitching on a fine fabric just makes a dreadful mess!
Pertex is very thin and very slippery and it also frays like anything. I ended up finishing the sides of the pressed open seams with the small zigzag stitch since anything else rucked up the fabric. On the seams which could be closed I used a magical iron togther Japanese seam sealing tape and then could finish the seam without the rucking problem. I used Pritt stick to temporarily secure the interfacing (around the zippers) prior to sewing, since using a hot iron or a steaming hot iron did terrible things to the fabric.
 I should have done the inside of the collar more carefully, making a proper hem before topstitching the zipper, but with the 5/8" seam allowances I had enough fabric to make a sort-of hem which seems OK - the pattern leaves an edge just overstitched which didn't work very well in Pertex.
I handstitched quiet a few areas - cuffs, bottom, round the zippers, to get the still rather ragged zig-zagged edges tucked out of the way, so that no ends would be hanging out, or hanging into the zippers.
I didn't pre-wash the fabric, but we hardly ever wash our Pertex jackets anyway, so at least if it ruins when washed it wont be for a while.
Review
3 comments:
And it fits just as perfectly as it looks!
Thanks!
I am trying to make a cycling jacket just like yours for my daughter, can you tell me where you got the pattern?
Carolyn,
See the previous posts:
http://julesstitches.blogspot.com/2006/02/pertex-cycling-jacket-not-yet.html
http://julesstitches.blogspot.com/2006/02/pertex-cycling-jacket-part-2-fleece.html
Post a Comment